DIY Floral Turkey for Thanksgiving
Fashion a fun DIY project for Thanksgiving this year with a floral turkey.
Each year around Thanksgiving, clients participating in horticultural therapy as part of the residential mental health treatment program harvest autumn color from the many gardens and natural areas of our campus to craft a beautiful floral centerpiece reminiscent of America’s favorite holiday bird, the turkey.
Clients practice mindfulness and often even laugh and experience joy while they create a floral turkey fit for any Thanksgiving table.
Use the step-by-step guide below to create your own DIY floral turkey.
Gobble, gobble!
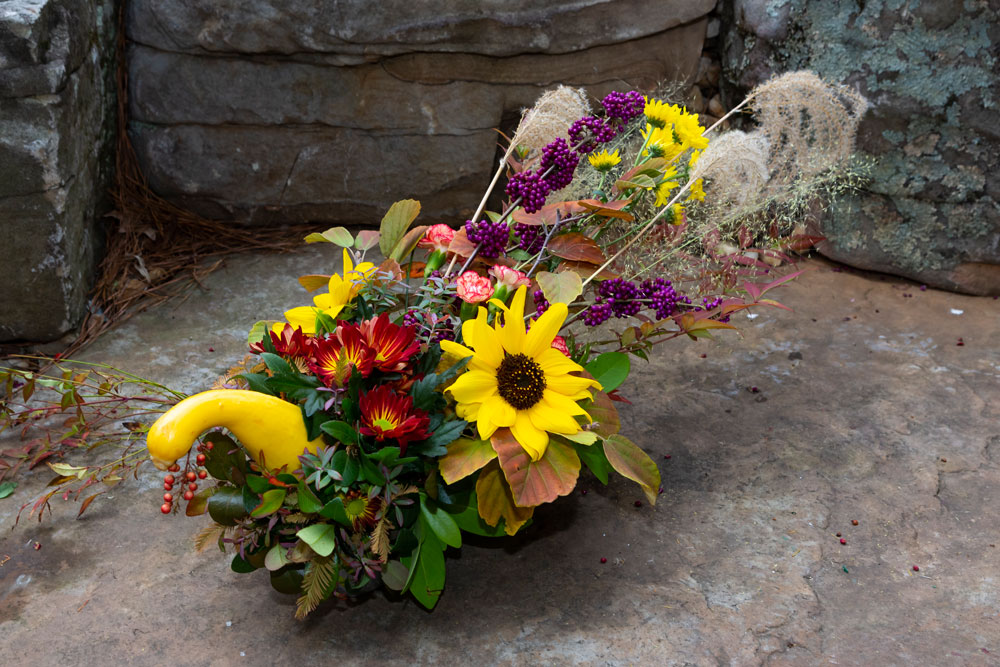
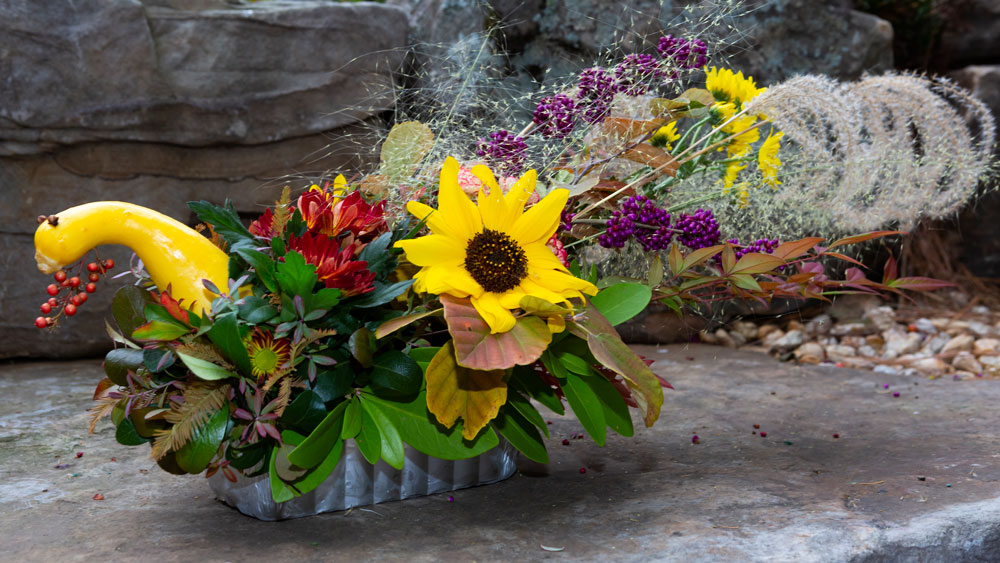
Floral Turkey Ingredients
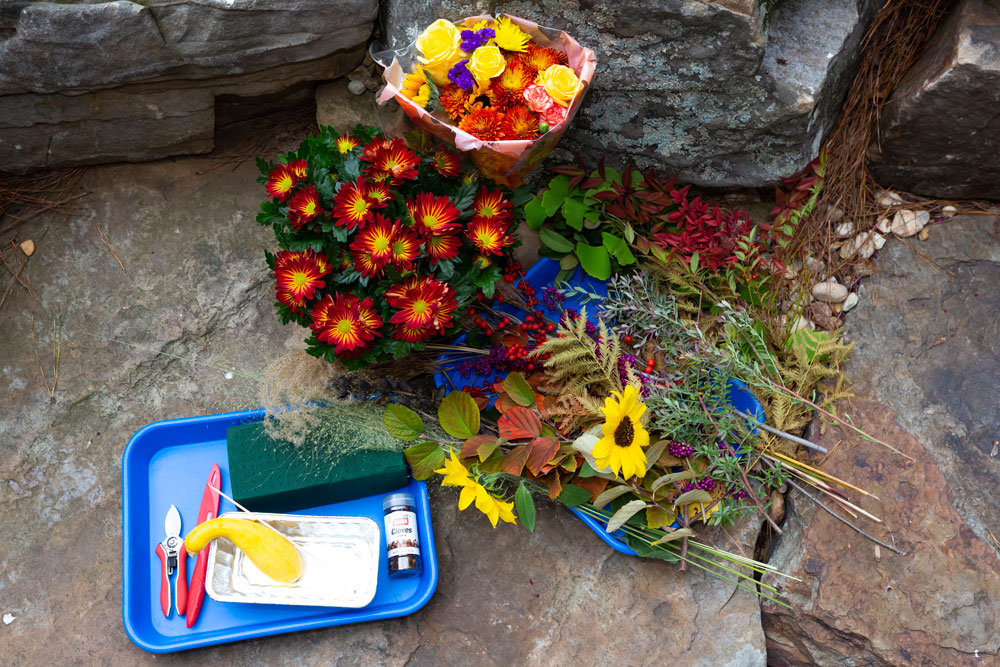
- 1 Aluminum Loaf Pan (8.5″ x 4.5″ x 2.5″)
- 1 Floral Foam Brick/Block
- 1 Yellow Crookneck Squash
- 1 Skewer (6 inches)
- 2 Cloves
- 1 Cluster of Berries (hawthorn, holly, or nandina work great)
- Assorted Autumnal Flowers (mums, sunflowers, aster, ageratum, snapdragons, or any others you happen to like)
- Assorted Seasonal Foliage, Berries, and Grasses (maple, sourwood, fothergilla, oakleaf hydrangea, beauty berry, deciduous holly, white cloud muhly grass, andropogon, and others you can find)
- Assorted Evergreen Foliage (dwarf blueberry, boxwood, dwarf pittosporum, pachysandra, cephalotaxus, or other similar leafy greens)
- Gardening Shears
- Small Knife
Creating Your Floral Turkey
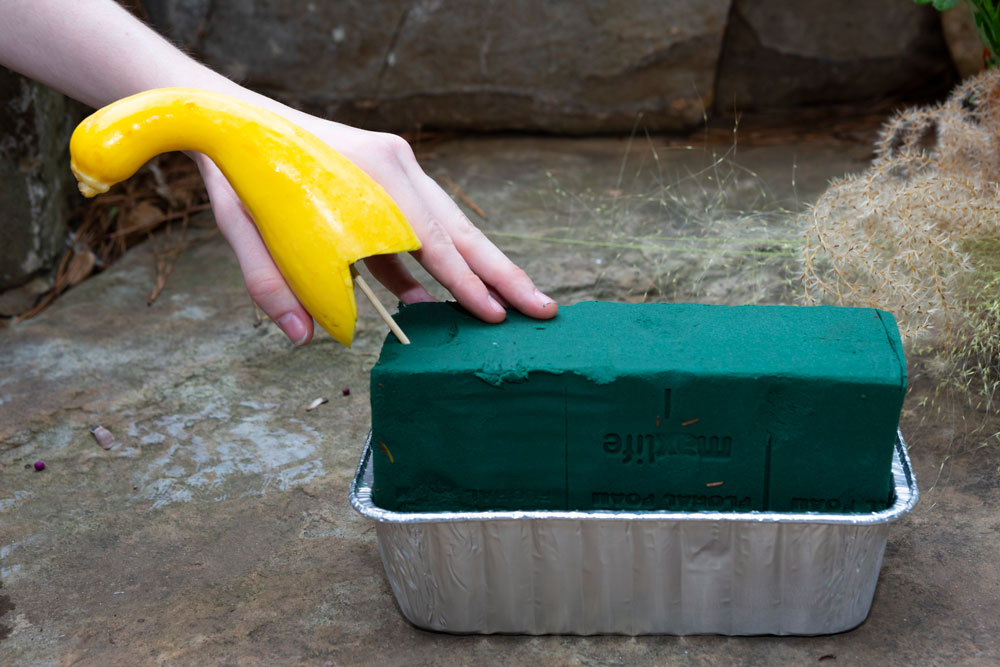
Step 1
Soak the floral foam length-wise in water. Avoid pushing the floral foam into the water, which can create air pockets. Allow the floral foam to sit and absorb water for about five (5) minutes. Place the floral foam on its side in the loaf pan. You’ll want the floral foam to be about two (2) inches higher than the lip of the pan. You may have to cut or trim the floral foam to make sure it fits snug into the pan.
Step 2
Using a knife, carefully cut at a right angle into the large, round end of the squash to create a notch. Insert half of the skewer into the notch of the squash. Then attach the squash to the edge of the floral foam brick/block.
Step 3
Add “feathers” to the turkey by first creating a tight, low collar around the base of the squash. Make sure to cover the floral foam, but don’t cover the neck of the squash. Finely textured evergreens and small flowers work best here.
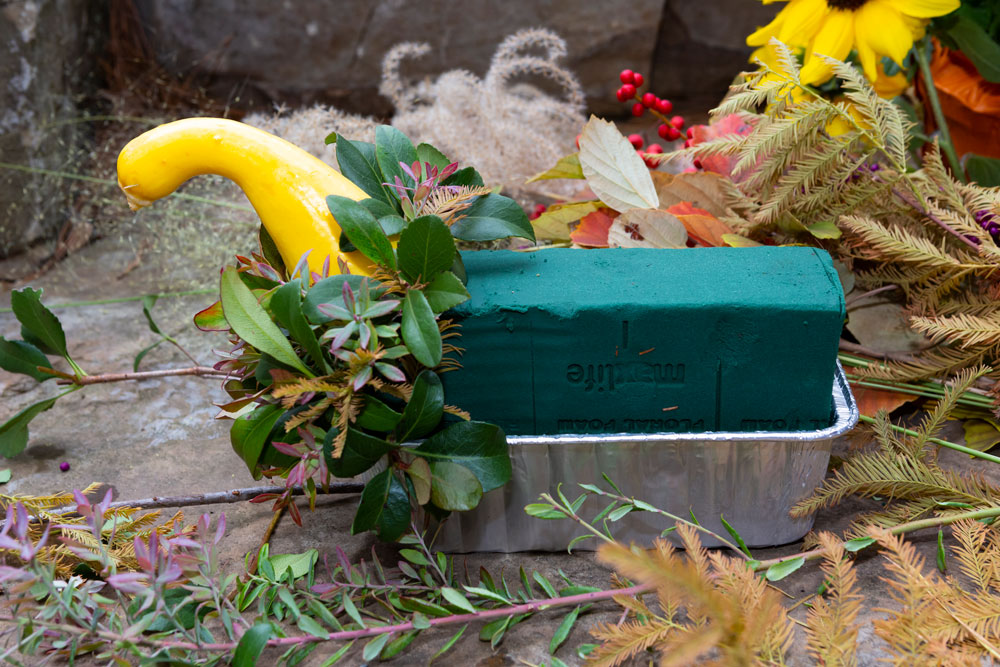
Step 4
Continue adding more evergreen foliage to loosely cover the floral foam. Don’t pack things too tight or close together that items get lost in the shuffle. Spread out the arrangement and try to make sure the floral foam isn’t visible.
Add colorful accents using the berries, foliage, or flowers you gathered to build up the body of the turkey.
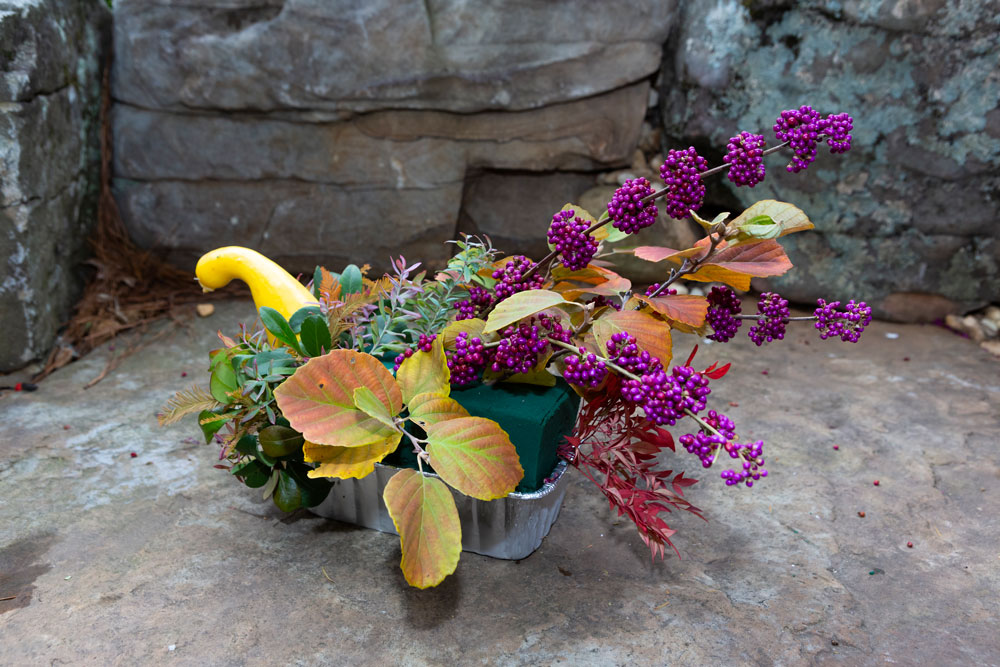
Step 5
Add some ornamental grasses (like muhly grass) to give your turkey a bit of fluff and airy-ness. Remember that you’re trying to replicate the turkey’s tail feathers.
Step 6
To create the eyes of the turkey, insert two cloves into the tip of the squash.
Using a toothpick, create a small hole on the underside of the bend in the squash (the turkey’s neck). Insert the stem of a cluster of berries into the hole. This replicates a turkey’s wattle.
Proudly display your creation! Place it on a table in your home, give it to someone as a gift, or decorate your office. To extend the life of your floral turkey, periodically add water to the loaf pan and floral foam.
Skyland Trail helps individuals struggling with mental illness find hope through evidence-based programs and a holistic, multidisciplinary approach to wellness. Expressive therapies like horticultural therapy help clients heal both mentally and physically by opening new or re-opening old pathways to express their emotions, find a new talent, create confidence, and connect with a larger community.